As discussed earlier, domain name is like the address of a house. But you need to build your house as well where you can keep your stuff, right?
There comes Web hosting into the picture. There are many web hosting companies that sell web space.
A web hosting company provides you web hosting service that includes web space where you store your website’s files, folders, media, and database, and other settings required to run a website.
Get the Bluehost Hosting
Once you have bought the web hosting, the very first thing you need to do is to update the nameservers of the domain in Godaddy. Let’s discuss how to do it.
How to Update Nameservers of the domain?
To do it, login to your Godaddy account and go to Domain section where you can see all of your domains listed there. Look for the domain on which you are going to create the blog, click on “Manage.”
You will be taken to this page:

Check the box that is for the chosen domain and click on nameservers [I have circled it in the screenshot]. It will show a drop down, click on Set nameservers.
Clicking on it opens a pop up which looks like below screenshot:

Click on Custom, and then choose Enter custom nameservers. Go to your email box and find the email that Bluehost sent you when you bought hosting. There you will get the nameservers. Copy them and fill it like I did. Check screenshot below:

Hit OK which will bring this page:
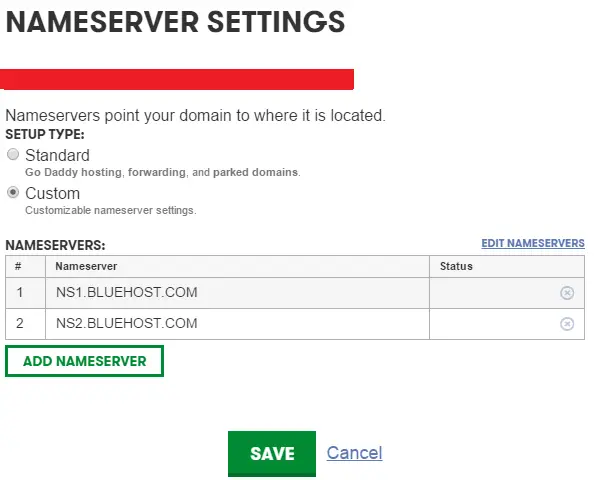
Hit on Save. That’s it! DNS (Domain name servers) propagation takes maximum of 24 hours. But whenever I changed the nameserver, it never took more than 30 Mins to update.
Your domain is now pointed to Bluehost. Now there are 2 cases:
# You have added the domain while buying hosting:If you have done it, you don’t need to add the domain now and directly move to installing WordPress.
# You are adding the domain as an Addon domain in your hosting:
If you are adding the chosen domain as Addon domain, then you need to follow few steps to do it which you can ask in comment or wait till next post.
Once your domain is added to your hosting account at Bluehost, you are ready to install WordPress.
How to install WordPress in Bluehost web hosting?
Once you buy web hosting, you will need to install WordPress to create your blog. Two ways you can install WordPress on Bluehost:
- Install using any third-party FTP program. Read a detailed guide to know this method by clicking here. This process requires 20-25 minutes to complete.
- Installing using WordPress app from Cpanel. This method requires 5 Minutes to complete. Read the steps below:
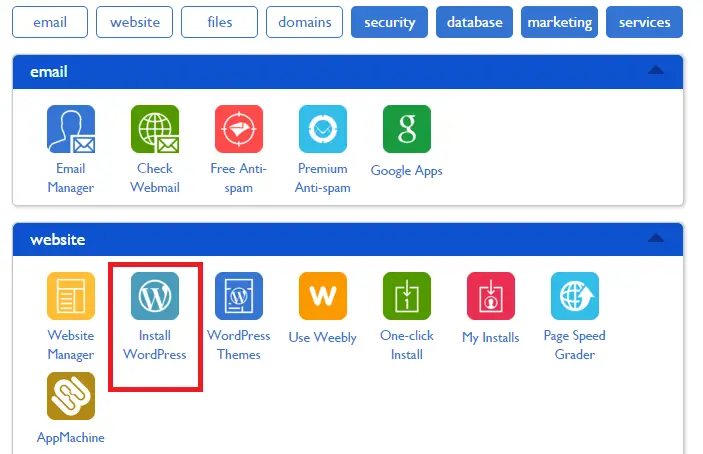
# Step 1
Log into your Bluehost account and click on Install WordPress.
# Step 2
Click on Install WordPress, it will take you to the page shown below:

# Step 3
Now, click on Install. It will bring to a page where you will be asked to select the domain name on which you want to install WP.
If this is your first domain, then there is nothing to choose. Just proceed and the WP will be installed on the Root domain.
# Step 4
But if you have already many other domains running on your hosting account then you need to select the one you have chosen to install WordPress. Choose that domain.
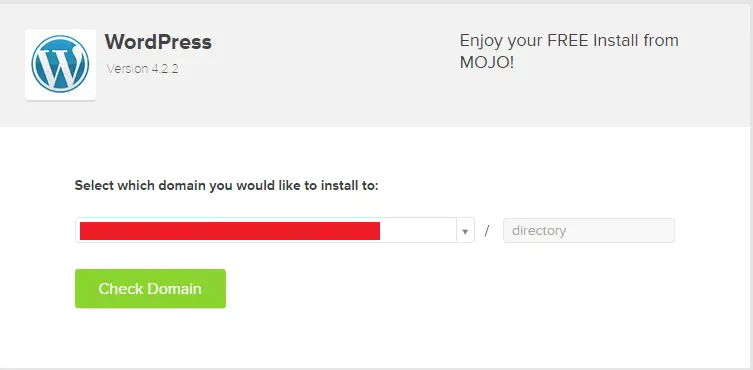
As I want to run the blog on the main domain, so no need to do with “directory.”
# Step 5
Click on Check Domain That will bring you a page where you will be given two check boxes as:
- Show advanced options.
- I have read the terms and conditions of the GPLv2.
Check both the boxes. First one will display the advanced options that look like:

Fill the details in the text boxes.
There you will notice “Automatically create a new database for this installation” which is checked but if you want to create the database manually then you can uncheck this and create Mysql database first. Click here to read the guide to create the MySQL database.
I would recommend keeping it checked and let the system create the database automatically.
# Step 6
Now click on Install Now and wait for some time while it shows as the screenshot below:
After a few seconds, you will see completion confirmation notification.

Now you can click “View Credentials” button to see the details to log into your newly installed WordPress site.
# Step 7
Now Log into the dashboard and launch the blog by clicking on click here as marked in the below screenshot:

Your blog is live now, and you can access it typing the URL into the web browser.

At this stage, you have your blog up and running! Now you need to do few essential settings in order to make your blog fully ready to post articles.
Preliminary settings which must be done before you start posting:
Install a professional Looking Theme: Once your WordPress blog is up and running, the first thing you should do is to make it look good. And to do that you must install a professional looking responsive theme [Read why do you need a responsive theme for your blog]. Choosing a perfect theme for your blog is an important task because it’s the look & feel that get the attention of the audience at first.
Many free and premium WordPress themes available on the web that you can explore and then make a final selection. I would recommend you to choose the premium one because they are well coded, optimized and have various options. Make sure the theme is mobile responsive because as per Google’s latest Mobile search update which rolled out on 21st April, 2015, Google gives preference to those sites in mobile search that are mobile friendly.
You may explore the galleries Of Mythemeshop, ThemeJunkie or TemplateMonstertheme vendors to choose the best theme.
Get a logo: Logo is important because it reflects your brand. You can get the logo designed by any professional designer. For affordable deals, you can check for gigs at fiverr.
Install Necessary Plugins: WordPress is popular because of its awesome plugin support. For everything, there are plugins in WordPress repository. There are many plugins that are essential to be installed. Here I am listing few of them:
- Backwpup
- ReplyME
- Commentluv
- Akismet
- GASP
- AddThis or Shareholic or floating social buttons or any other social sharing plugin
- WordPress Related Post
- WordPress SEO by Yoast
- WP Super Cache or W3 Total Cache
These are few basic plugins which are must, but you can install many more as the requirement comes.
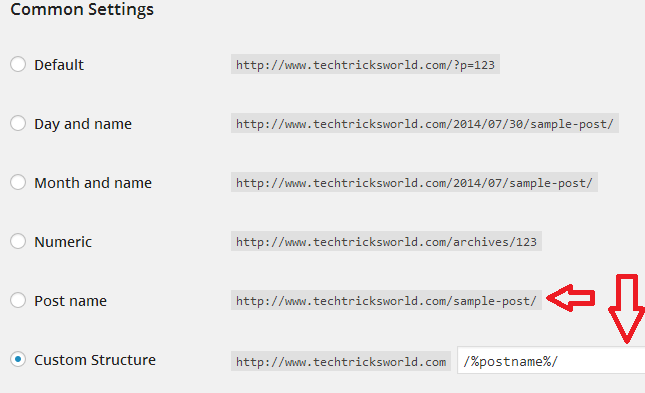
Permalink Settings: Permalinks setting is critical because it forms the URLs of internal pages. Go to settings >> Permalinks and select the Permalink structure as per your choice. Having search & human friendly URLs are recommended. In the below screenshot, you can see the options. I am a fan of the one which I have marked as it keeps the URLs short, simple and SEO friendly.
Set up Important pages: Before you start posting articles on the blog, you should set up the relevant pages which are about, contact, Privacy policy, and disclaimer.
Install Google Webmaster and Google Analytics: Google webmaster tool and Google Analytics are essential to be installed on the blog as webmaster tool tells all about on site issues, backlinks, and other details whereas Analytics records the visits on the blog.
Now, your blog is ready to post articles. Many more things still required to be done, but they can be done gradually as the requirements come.
Final words
This step-by-step technical guide can be very helpful to you if you are thinking to build your first blog. I tried to make everything clear in a way that you can easily follow the steps and successfully launch your blog. But if you still find any difficulties then please ask your problem in the comments.
Everything you require to start a blog has been described in this 2200 words long how-to guide.
Note: There are smaller guides I wrote already on my other blog, so I tried to avoid writing those things again, but I linked them wherever required so that you can take reference of those guides as well.
If you enjoyed reading this guide then please help me spread it everywhere so that it can reach everyone who needs this.

